When are invoices related to paying salaries created for the employer?
An invoice for the salary is created immediately when the salary is paid. An invoice for employer expenses (withholding tax and sickness insurance) is created after the 6th day of the pay period. Insurance companies invoice the employer using their own invoicing cycle.
How do I add a car benefit?
Car benefit, employee: The car benefit must be declared monthly. When you add the car benefit to the employee details as a default pay row, the row will be included automatically in each salary.
- Open the employee details.
- On the Default Pay Rows tab, add a new row for the car benefit.
- Click the info icon next to the new car benefit row you just added. Here you can further define the calculation criteria for the car benefit. The imputed tax value of the car benefit can be calculated using the tax administration’s calculator.
Car benefit, self-employed: The car benefit for self-employed persons is added to the calculation in the same way as for employees. Sometimes, entrepreneurs only pay themselves a car allowance and no salary. However, as the car benefit is a taxable benefit, it will eventually become taxable. If no salary is paid with the car allowance from which the tax on the car allowance can be deducted, the tax must be paid at the end of the tax year, in the final tax assessment. It is therefore advisable to pay at least the amount of the withholding tax on the car benefit as a salary when you register for a car benefit. This way, there are no nasty surprises in the form of residual tax.
Note! When paying a car benefit, you should make the calculation well in advance within the month to which you want the benefit to apply, so that the Income Register declarations are also applied to the correct month.
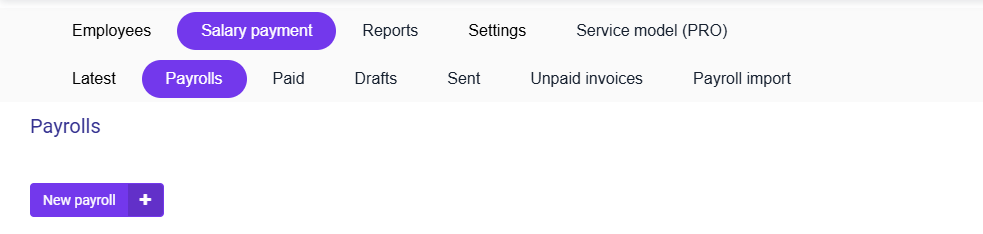
How do payrolls work?
The payroll can be used to calculate/pay multiple salaries at the same time. Invoices from salaries to the invoice payment service still come as individual invoices.
- Select Salary payment – Payrolls – New payroll to create a new payroll.
- Enter the basic details of the new payroll.

- You can name the list as you wish.
- Select the type of employment relationship for the holiday calculation. If you pay only self-employed salaries, allowances, or board fees, select Payroll without holiday calculation. For monthly salaries, select Monthly salary.
- Also select the payday, salary period and number of working days. Salary calculations can have their own salary periods, but the salary period given here will default to the calculation. The salary period and number of working days can be changed separately for each salary added to the list. The payday on the list can also be changed before you send the payroll to payment.
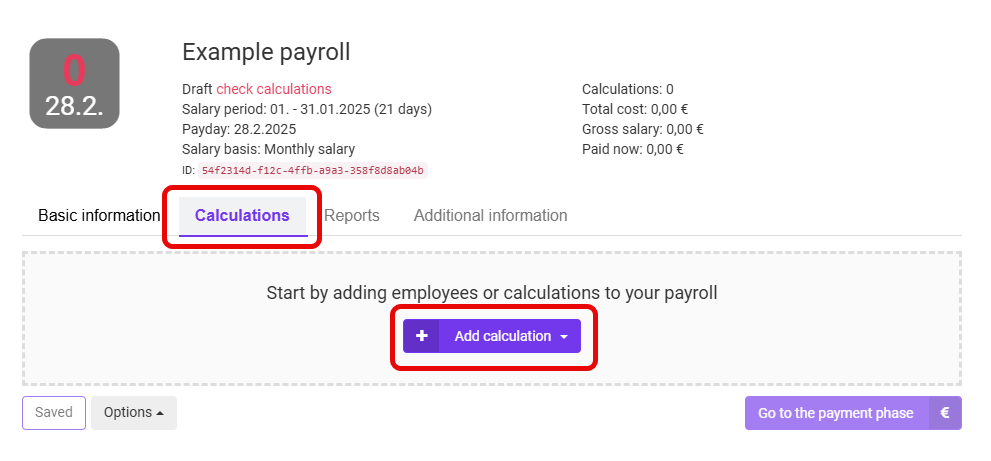
- Finally, select Create payroll.
- Once you have created a new payroll, it will open as a blank list for editing. Select Calculations – Add calculation to add the first calculation. You can add employees, draft calculations or add copies of previously paid salaries to the list. Here you are adding employees to the list (making new calculations for them). The employees you have selected will be added to the payroll. If there are default pay rows in the employee data, they are automatically imported into the payroll as proposals.
- Once you have added a calculation or an employee to the payroll, you can open the payroll rows by pressing the employee’s name or by selecting Edit rows.
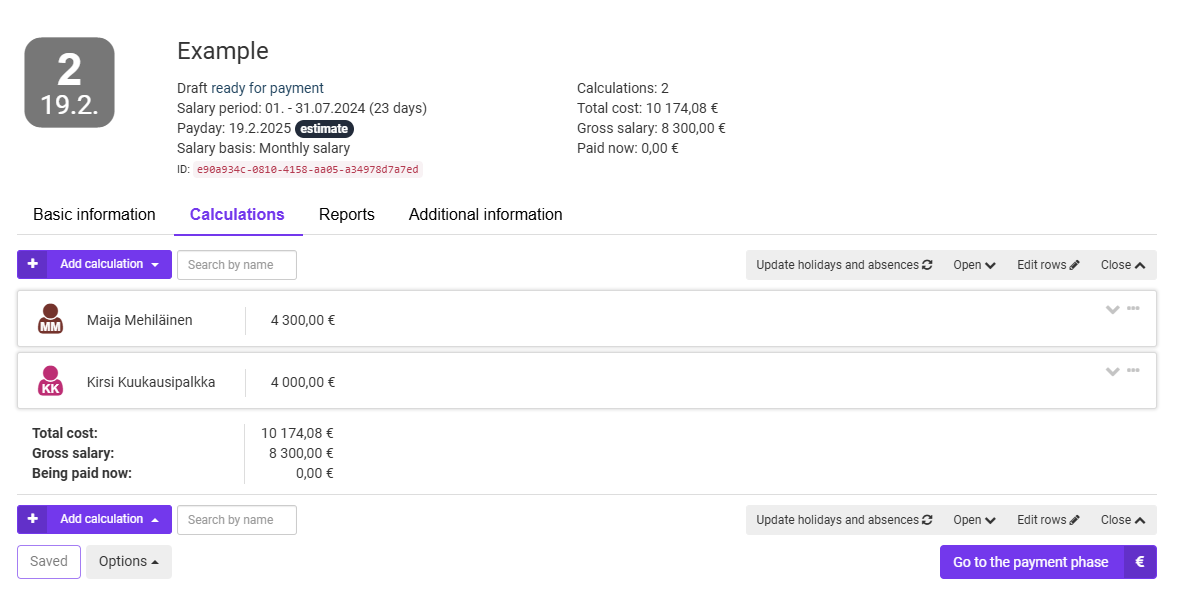
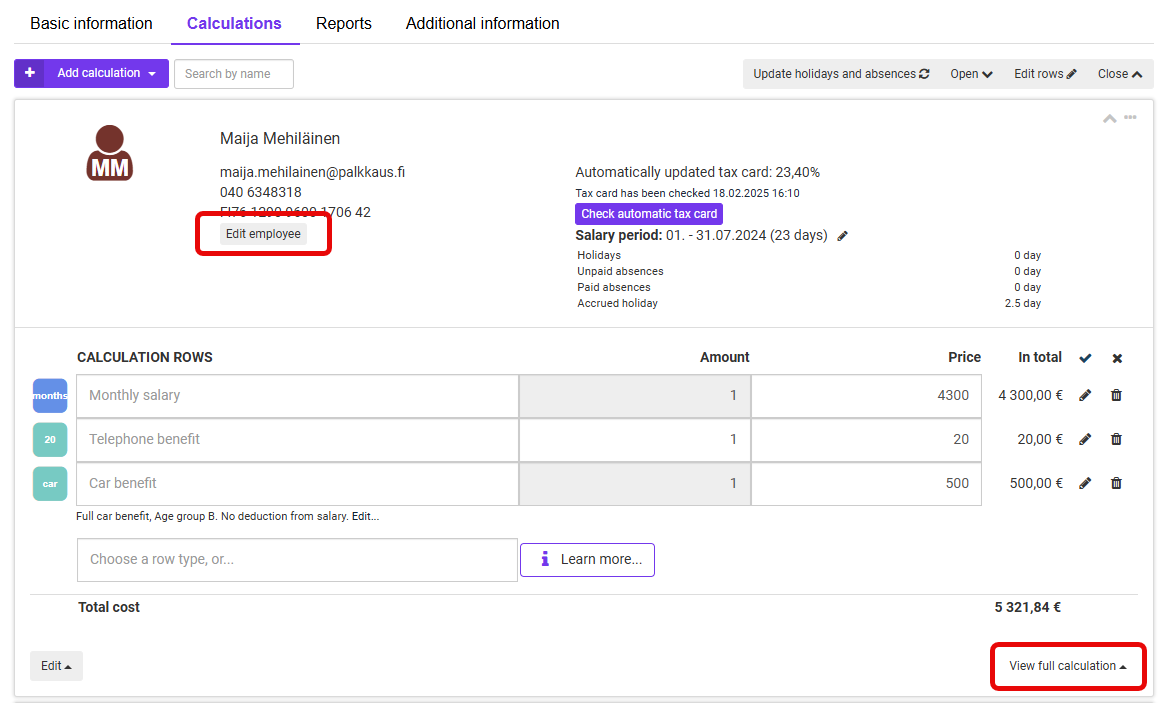
- You can edit the payroll rows and salary period by clicking on the small pencil icon next to each item. In the bottom left corner, there is an Edit menu with additional options. You can also access additional options by clicking on the three small dots at the top. The menu offers a wide range of editing options for the calculation. If you wish, you can also export the payroll rows edited in the list to the employee’s data or retrieve the data again from the employee’s data.
- You can also edit employee data by selecting Edit employee. At the bottom right of the calculation is the View full calculation menu, where you can view this calculation from the employee’s or employer’s perspective, as a payroll document. From there you can also save or print the calculations.
- Once you have made the necessary edits and are satisfied with the calculation, click the Save Edits button at the top or bottom of the page. From the Options menu in the lower left corner, you can save the data of all the employees in the list back to the employee records or retrieve them again. You can also use the menu to make a completely new copy of the payroll.
- Last, you can move on to the payment phase.
How do I handle salary advances?
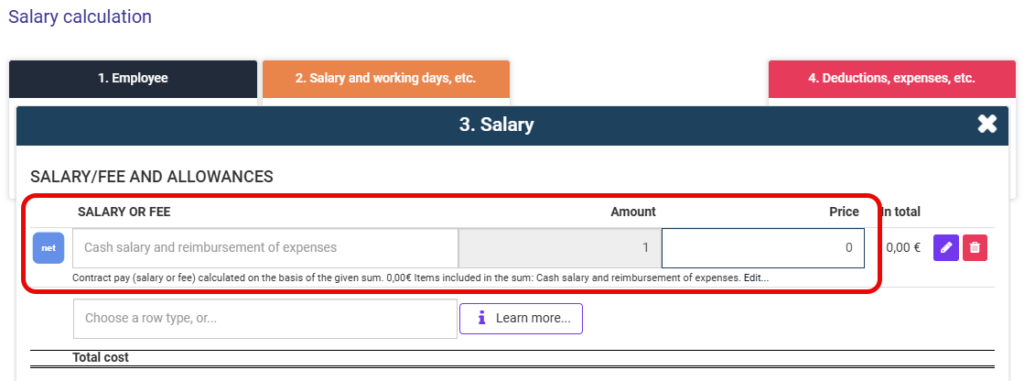
If you have paid yourself or an employee directly from your company account, it must be processed during the current month. To record paid salary advances, add the salary type line Net wage or salary in section 3. Salary and enter 0 (zero) as the price.
Then in step 4. Deductions, expenses, etc., under Deductions, select Pay advance and enter the amount paid in euros.

You can check the correctness of the pay advance processing by consulting the employee’s pay slip. If the amount to be paid is 0 (zero), the pay advance has been processed correctly. An invoice for this salary must also be created in the Invoice Payment Service and approved, which will trigger the Incomes Register declarations.
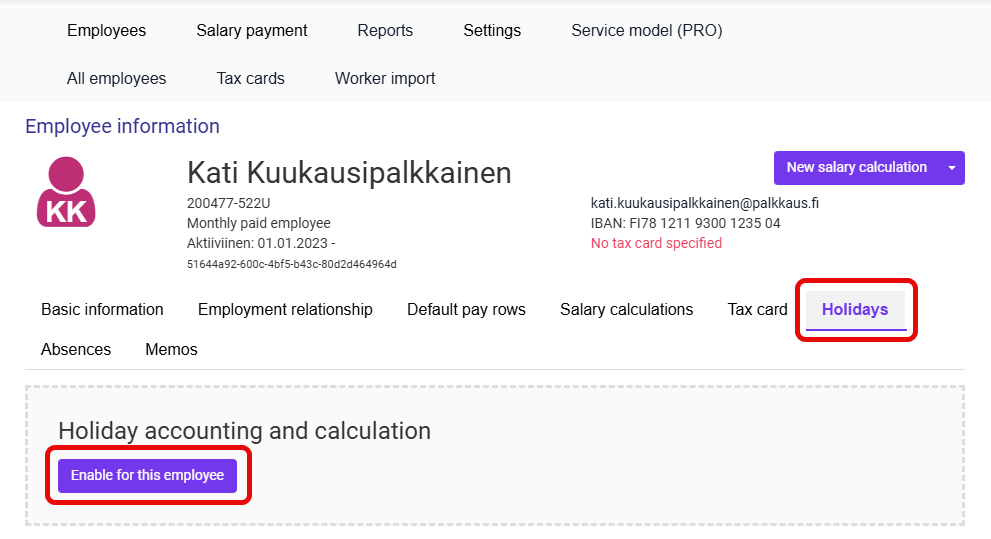
How to set up holiday tracking for a monthly paid employee?
Holidays are enabled from the employee details, under Holidays. Select Enable for this employee.
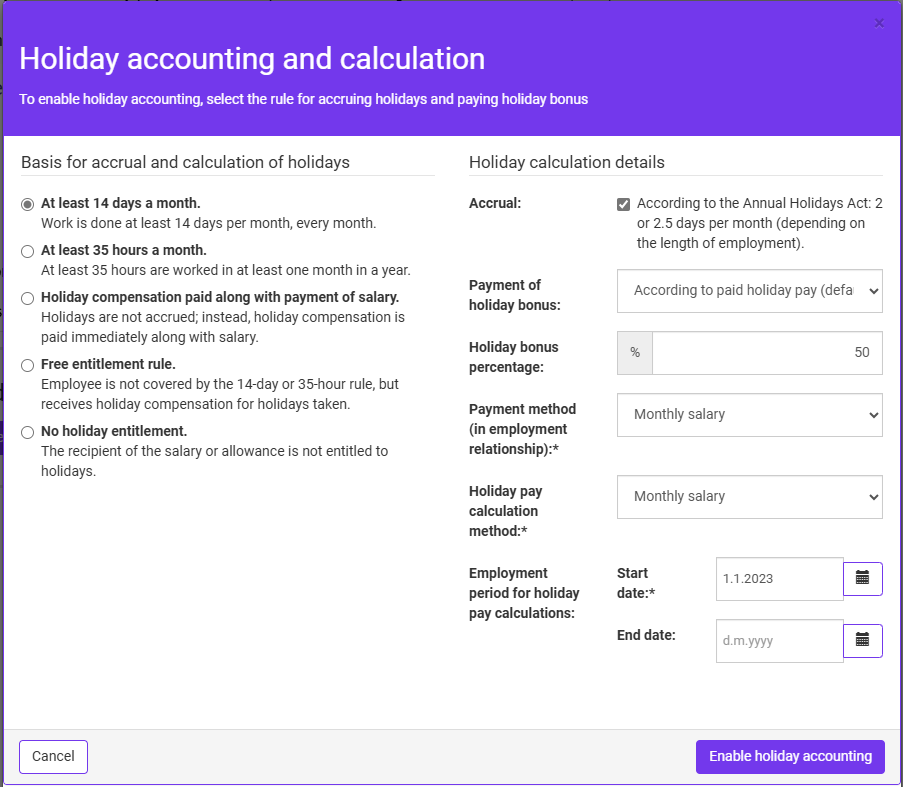
Once you have selected the correct data for holiday accounting, select Enable holiday accounting. Please note that for the time being our system only works for monthly paid employees (=14 day rule).
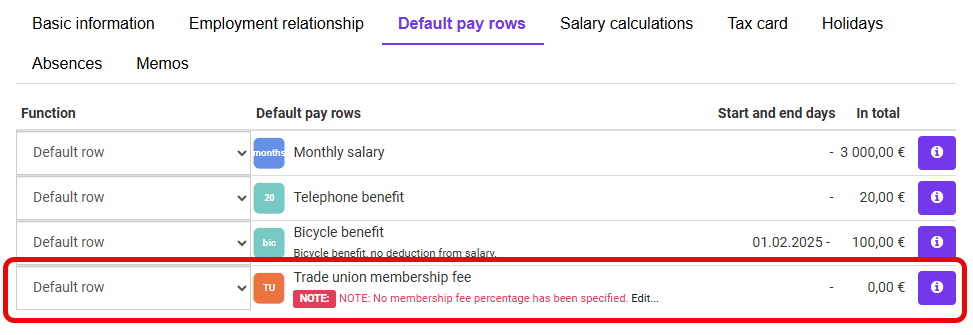
How to add a garnishment or membership fee?
Garnishment
The employer receives a letter from the enforcement authority informing them of the suspension of payments. This letter will tell the employer how to collect the garnishment.
You can use this link to go to the Prohibition on payments calculator (opens in a separate window), and calculate the amount of the default. You can use the payment prohibition number to directly retrieve the amount of the enforcement. You can also fill in the items in the letter yourself to get the amount to be withheld from the employee.
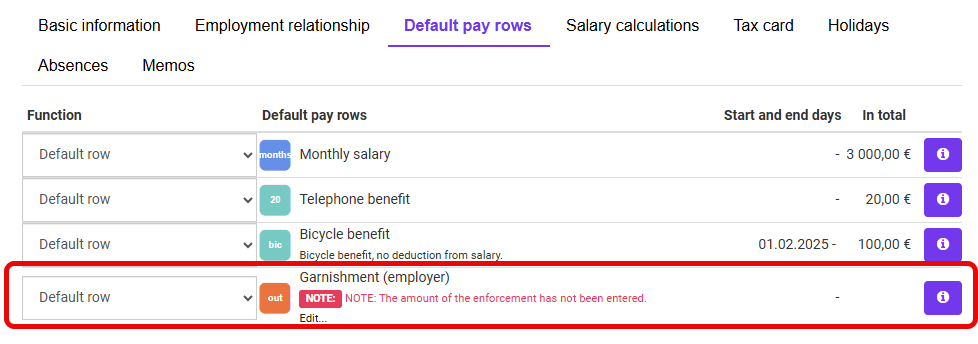
You can enter the amount of the garnishment in the employee’s data as a default pay row. This way, the garnishment is ready on the salary calculation and is not accidentally forgotten in the payroll. To add the garnishment to the employee’s default pay row, select the employee from the Employees menu. From the Default pay rows tab, add Garnishment as a new default pay row. From the info icon on the right, you can add, among other things, the amount and reference number.
Trade union membership fee
The employee and the employer can agree that the employer will deduct the employee’s trade union membership fee from the employee’s pay and pay it on the employee’s behalf to the union designated by the employee.
The deduction of trade union membership fees from the salary must always be agreed separately and the employee must submit the payment instructions to the employer.
You can add the trade union membership fee as a default pay row for an employee from the Employee details. Add the new default pay row as the Trade union membership fee. From the info icon on the right, you can add, among other things, the percentage of the contribution to be collected and the reference number.
How is a No Pay notification generated?
The service automatically reports salaries paid in the service to the Incomes Register. The payroll declaration is made within five days of the payday (the salary is credited to the employee’s account) and the separate declarations as well as the “no salary payment” declarations (zero declarations) are always made on the 5th day of the month following the payment of the salary.
The No payment declaration is made 12 months of the last payment of salaries, if the employer is registered in the Employers’ Register. No payment declaration is not made if there are no paid salaries in the service.
In the service settings (Settings – Payment settings), you can choose not to send separate notifications from the service, in which case the service will not send either the separate notifications or the No pay notification. This option should be selected if the employer also pays salaries through another channel. In this case, the employer or the accounting office will have to make one single separate declaration for the salaries paid.
How do my employees get their pay slips?
For salaries paid through Simple Salaries, the pay slip is automatically sent to the employee by email when an email address is added to the employee details. The employee can also retrieve the pay slip by logging in to the service. The employer can also print or send the payslip to the employee some other way.
Where can I get the income register report and salary statements for the auditor?
If you would like us to provide salary statements to your employees or the 600-reports from the Income Register to your auditor, contact the Simple Salaries support on weekdays between 9 am and 3 pm.
Simple Salaries support
t. 0300 871 141 (1,99 €/min)
simple.efecte@talenom.fi


