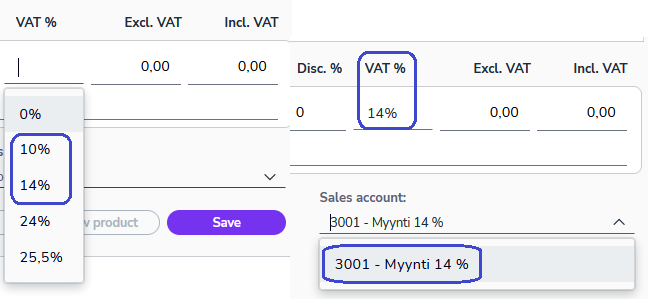
When creating an invoice in the Sales Invoicing service, it is necessary to select the sales account to be used on the invoice. For those sales affected by the VAT increase from 10% to 14%, a new sales account will be added for the 14% VAT rate.
The user must first select a VAT rate from the VAT % menu so that the sales accounts for that VAT rate will be available in the Sales account menu. The VAT rate for the selected sales account can be seen in the VAT % field on the invoice line.
Customer register
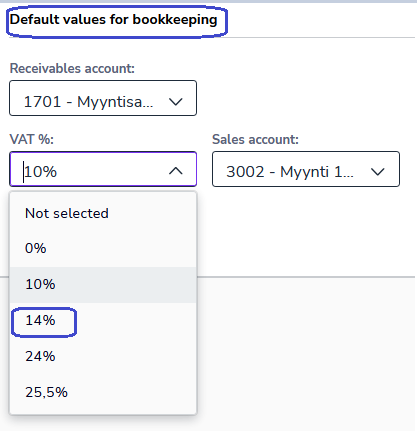
Updating customer information with the new VAT rate:
- Sign in to Easor App. From the main menu on the left, select Sales invoicing – Customers.
- Select the customer you want to update. You can search for a customer, for example, by customer name, customer name or business ID.
- On the customer card, go to Default values for bookkeeping.
- In the VAT % field, change the VAT rate to 14%. In this case, in the Sales account field, the program suggests a sales account at that VAT rate.
- To save your changes, click Save at the top of the view.
Product register
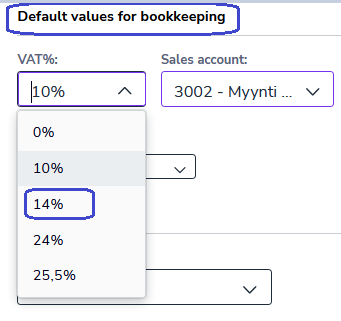
Updating product information with the new VAT rate:
- Sign in to Easor App. From the main menu on the left, select Sales invoicing – Products.
- Select the product you want to update. Searches can be done, for example, by product ID, product name or description.
- On the product card, go to Default values for bookkeeping.
- In the VAT % field, select 14%. No other changes are necessary.
- To save your changes, click Save at the top of the view.


