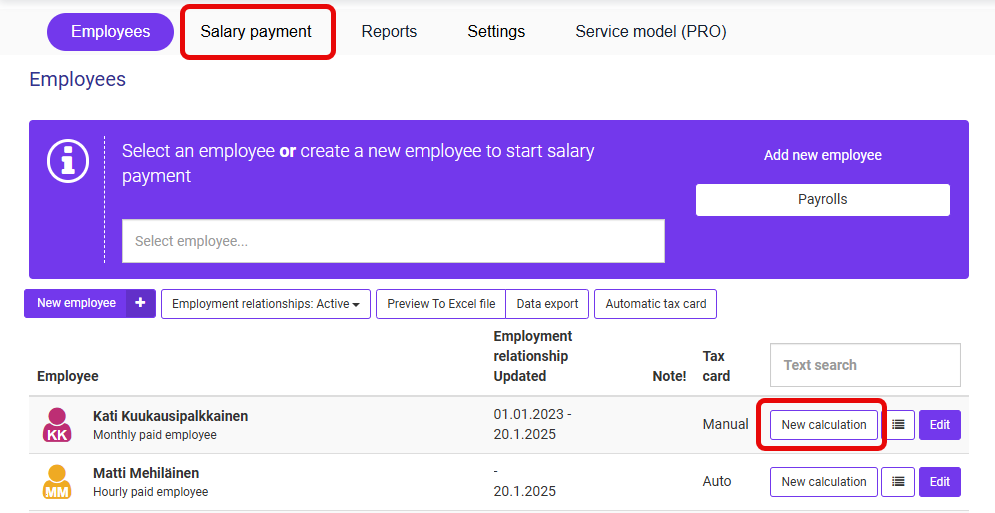
There are two ways to start calculating salaries: from the New calculation button next to the employee’s name or from the Salary payment button in the top menu.
Employee data
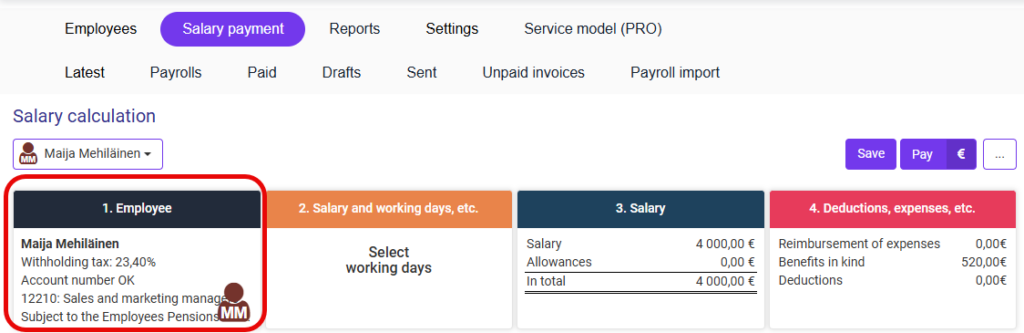
Below is an image of the view that opens when the salary payment is started. Salary payment is a four-step process, where the first step is already complete, unless the employee data needs to be changed. If you want to edit the employee data, click on 1. Employee and make the necessary changes.
Selection of salary period and payday
If the employee data is up to date, the salary payment starts from step 2. Salary and working days, etc. Here you should select the payday and salary period. If the payday is left blank, the salary will be transferred to the employee’s account as soon as the bank processes the payment.
It is worth noting that even when an exact date is chosen, the money will leave the employer’s account on the day before the payday (= due date). If the employee and the employer have the same bank, the money can be transferred to the employee’s account on the due date.
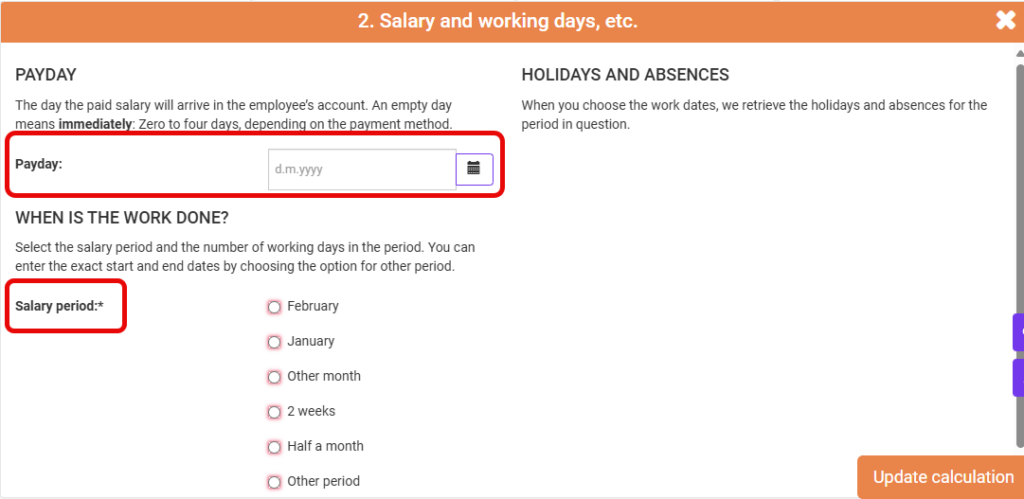
Once the payday and salary period have been selected, you can proceed to the next step by selecting Update calculation. Updating the calculation always saves the changes.
Salary
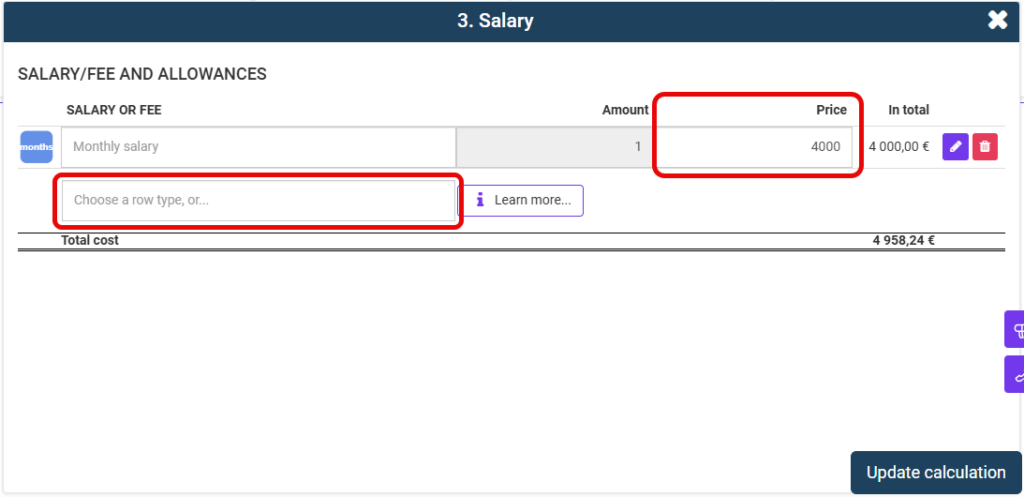
In step 3. Salary, information on the salary to be paid is entered. If default pay rows have been added to the employee’s personal data, they will now appear here as default rows. However, the default salary rows can be edited and new rows can be added. Once the required rows are ready, select Update calculation.
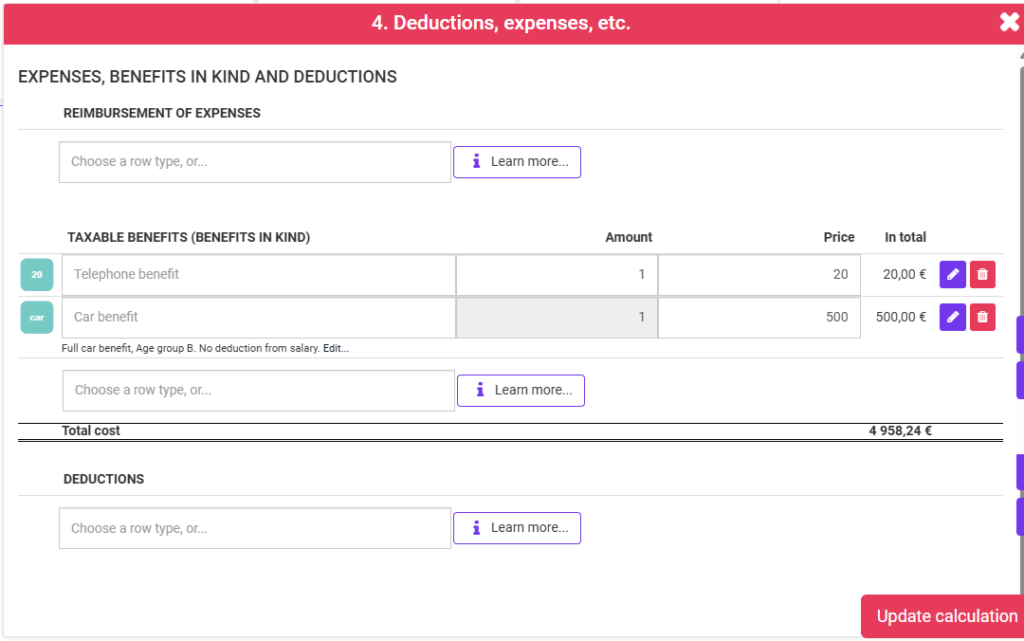
Deductions, expenses or benefits in kind
If you want to pay expenses, benefits in kind or various deductions in connection with salaries, you can add them in section 4. For further instructions on how to add benefits in kind, see the FAQ chapter.
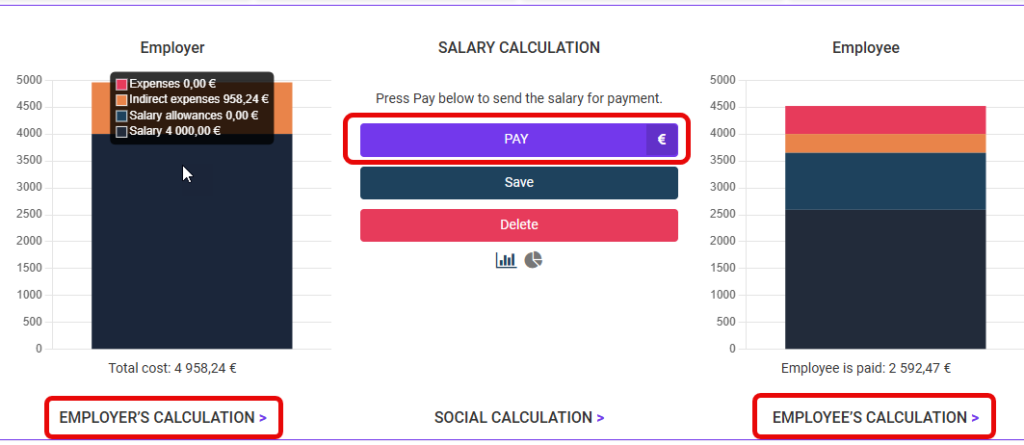
Payment of salary
The steps in the salary payment process are now done. On the right, you can see the net salary transferred to the employee’s account and, on the left, the employer’s total salary expense. In the employer and employee calculations, you can see a more detailed breakdown of the calculated salary. Select Pay in the middle to generate an invoice for the payment of the salary.
In the Payment of salaries view, you can view the invoices that have been generated.
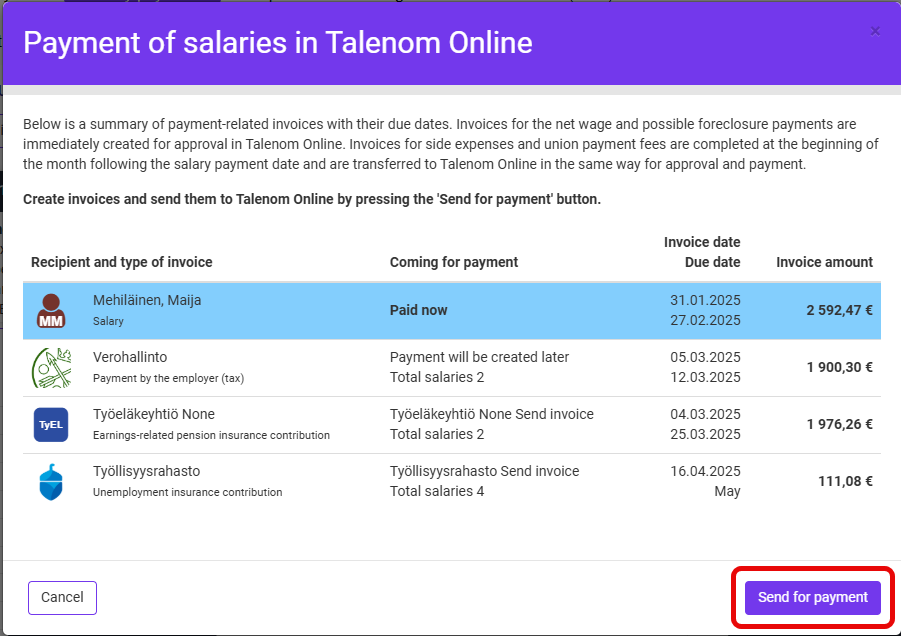
Select Send for payment to create an invoice for the salary to be paid to your Payments service. It may take several minutes to generate the invoice. Once the invoice has been accepted, the salary information and separate declarations are sent to the Incomes Register.
The Tax Administration’s invoice is created on the 6th of the following month. The Employment Pension Fund and the Employment Fund will send invoices later, based on the information sent to the Incomes Register (provided that the insurance company and insurance number are stored in the system).


