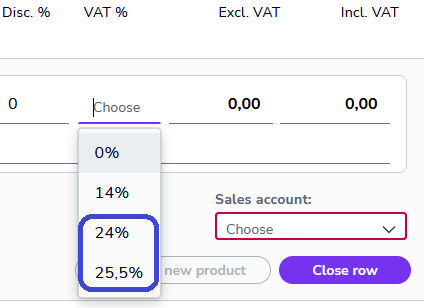
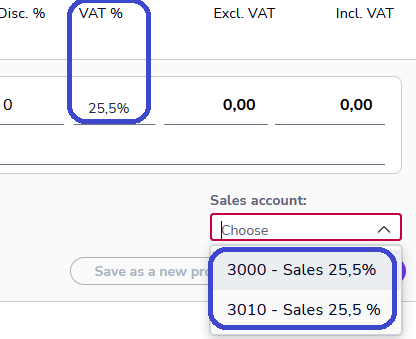
In the Sales Invoicing service, a sales account with the same name can appear twice because Talenom has added a new sales account with the same name and number and a VAT rate of 25.5% to the VAT rate of 24% that the company has been using.
The user must first select a VAT rate from the VAT % menu so that the sales accounts for that VAT rate will be available in the Sales account menu. The VAT rate for the selected sales account can be seen in the VAT % field on the invoice line.
Customer register
On 4.9.2024, Talenom will update the customer and product registers in Talenom Online with the new VAT rate of 25.5%. If individual customer data needs to be updated at the new VAT rate before the automatic update, follow these steps:
- Sign in to Talenom Online. From the main menu on the left, select Sales invoicing – Customers.
- Select the customer you want to update. You can search for a customer, for example, by customer name, customer name or business ID.
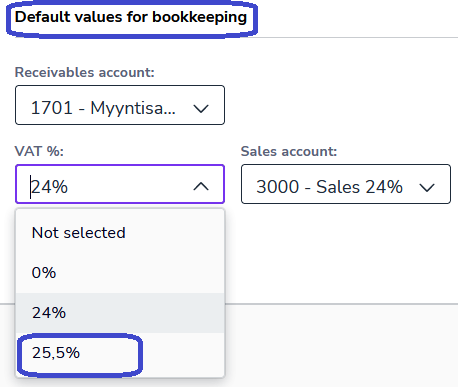
- On the customer card, go to Default values for bookkeeping.
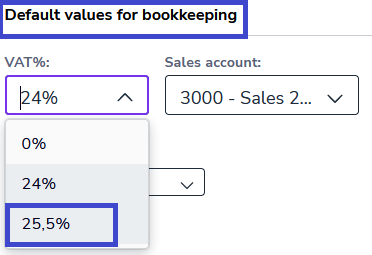
- In the VAT % field, change the VAT rate to 25.5%. In this case, in the Sales account field, the program offers a sales account at that VAT rate.
- Open the Sales account menu and check that the selected sales account has the correct VAT rate, 25.5%.
- To save your changes, click Save at the top of the view.
Product register
On 4.9.2024, Talenom will update the customer and product registers in Talenom Online with the new VAT rate of 25.5%. If individual product data needs to be updated with the new VAT rate before the automatic update, follow these steps:
- Sign in to Talenom Online. From the main menu on the left, select Sales invoicing – Products.
- Select the product you want to update. Searches can be done, for example, by product ID, product name or description.
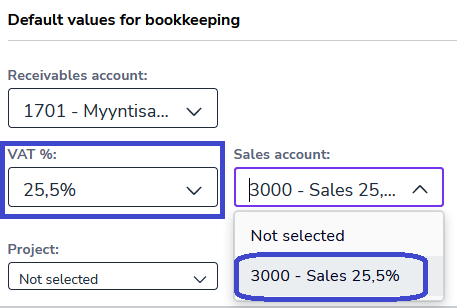
- On the product card, go to Default values for bookkeeping.
- In the VAT % field, select 25.50%. No other changes need to be made.
- To save your changes, click Save at the top of the view.


